1. 휴가 관리 테이블 만들기

이런 필드 값을 가진 휴가 관리 테이블을 생성했다 (이름은 VACATION으로 지었다).
그러고 EMP 테이블에 있는 HIREDATE 필드에서 연도 데이터만 추출한 뒤 sysdate의 연도로부터 뺀 값을 15 만큼 곱해서 연차(VAC)를 입력해 주었다 (근무연도 1 년에 15 개 씩 휴가 입력).
UPDATE VACATION
SET vac = (SELECT (EXTRACT(YEAR FROM sysdate) - EXTRACT(YEAR FROM e.hiredate)) * 15
           FROM emp e
           WHERE e.attid = VACATION.attid)
WHERE EXISTS (SELECT 1 FROM emp e WHERE e.attid = VACATION.attid);
그 뒤에는 휴가의 값이 음수가 되지않게 제약 조건을 추가하였다.
사용된 휴가란은 양수가 되지않게 해서 휴가를 못쓰게 해보자!
ALTER TABLE VACATION
ADD CONSTRAINT positive_value CHECK (VAC >= 0);
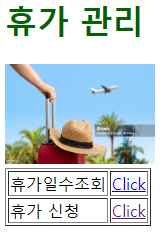
그러고 휴가 관리 웹을 간단하게 만들어서 휴가 일수 조회, 휴가 신청 등 기능을 추가해보자.
<!DOCTYPE html>

<html>

<head>
<meta charset="UTF-8">
<title>휴가 관리</title>

<Script>

    const textcolor = document.querySelector(".textcolor");
    function changeColor() {
        textcolor.style.color = "blue";
    }

</Script>

    <script type="text/javascript" src="./script/hello.js"></script>
</head>

<body>
    <h1 style="color: darkgreen;">휴가 관리</h1>
    <img src="./img/vac.jpg" width="150" height="100">

    <table border="1">
        <tr><td>휴가일수조회</td><td><a href=./emp_vac_info.jsp>Click</a></td></tr>
        <tr><td>휴가 신청</td><td><a href=./emp_vac.jsp>Click</a></td></tr>

    </table>

</body>

</html>
일단 휴가 일수 조회창을 만들었다.
간단히 퀴리문을 사용해서 테이블을 표시했다.
<%@ page import="java.sql.*" %>
<%@ page import="javax.naming.*, javax.sql.*" %>
<%@ page contentType="text/html;charset=UTF-8" language="java" %>
<html>
<head>
    <title>남은 휴가 조회</title>
</head>
<body>
<h1>남은 휴가 조회</h1>

<%
    Connection connection = null;
    Statement statement = null;
    ResultSet resultSet = null;

    try {
        // Load the Oracle JDBC driver
        Class.forName("oracle.jdbc.OracleDriver");

        String username = "system";
        String password = "sejong";
        String url = "jdbc:oracle:thin:@localhost:1521/xe";

        // Establish the database connection
        connection = DriverManager.getConnection(url, username, password);

        // Execute a SQL query to retrieve employee and vacation information
        String sqlQuery = "SELECT ename, hiredate, emp.attid, vac, usedvac FROM EMP JOIN VACATION ON EMP.ATTID = VACATION.ATTID";

        statement = connection.createStatement();
        resultSet = statement.executeQuery(sqlQuery);

        // Display the retrieved employee and vacation information
        out.println("<table border='1'>");
        out.println("<tr><th>Employee Name</th><th>Hire Date</th><th>Attendance ID</th><th>Remaining Annual Leave</th><th>Used Vacation Days</th></tr>");

        while (resultSet.next()) {
            String empName = resultSet.getString("ename");
            Date hireDate = resultSet.getDate("hiredate");
            int empId = resultSet.getInt("attid");
            int vacDays = resultSet.getInt("vac");
            int usedVacDays = resultSet.getInt("usedvac");

            out.println("<tr><td>" + empName + "</td><td>" + hireDate + "</td><td>" + empId + "</td><td>" + vacDays + "</td><td>" + usedVacDays + "</td></tr>");
        }

        out.println("</table>");

    } catch (Exception e) {
        e.printStackTrace();
    } finally {
        // Close the resources in the reverse order of their creation
        try { if (resultSet != null) resultSet.close(); } catch (Exception e) { /* ignored */ }
        try { if (statement != null) statement.close(); } catch (Exception e) { /* ignored */ }
        try { if (connection != null) connection.close(); } catch (Exception e) { /* ignored */ }
    }
%>

</body>
</html>

2. Flutter 레이아웃 만들기
import 'package:flutter/material.dart';

void main() {
  runApp(const MyApp());
}

class MyApp extends StatelessWidget {
  const MyApp ({super.key});
  @override
  Widget build(BuildContext context) {

    return MaterialApp(
        home: Scaffold(
          appBar: AppBar(), //상단 위젯
          body: Container(), // 중간 위젯
          bottomNavigationBar: BottomAppBar(), //하단 위젯
          )
        );
  }
}
'AIoT' 카테고리의 다른 글
| AIoT 정규 39일차 (0) | 2024.02.26 |
|---|---|
| AIoT 정규 38일차 (0) | 2024.02.23 |
| AIoT 정규 36일차 (0) | 2024.02.22 |
| AIoT 정규 35일차 (0) | 2024.02.20 |
| AIoT 정규 34일차 (0) | 2024.02.19 |