1. 리스트 값에서 가장 큰 값과 작은 값을 구하고 두 수의 합을 구하는 함수를 구현하고 아래 리스트로 테스트하세요.
a = [38, 21, 53, 62, 19]
: 내장함수 min()과 max()를 활용해서 문제를 풀어보자
a = [38, 21, 53, 62, 19]

def sum_min_max(l):
    for i in l:
        minimum = min(l)
        maximum = max(l)
        result = minimum + maximum

        print(f"Sum of minimum({minimum}) and maximum({maximum}) is {result}")
        break

sum_min_max(a)
Sum of minimum(19) and maximum(62) is 81
2. GUI(Graphical User Interface), TKinter 기본 이해
https://cafe.naver.com/dowhatevers/87
제 2일차 - GUI, TKinter 기본 이해
1. 윈도우 생성 위의 코드를 실행하면 다음과 같은 화면, 다음과 같은 위도우가 나타납니다. 위의 코드에서 Tk()를 생성한 부분 다음줄 부터 각자 생각한 부분에 대해서 코드...
cafe.naver.com
import tkinter
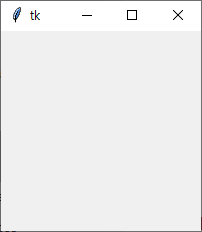
top = tkinter.Tk()
# you insert code here
top.mainloop()위의 코드를 실행하면 다음과 같은 화면, 다음과 같은 위도우가 나타납니다. 위의 코드에서 Tk()를 생성한 부분 다음줄부터 각자 생각한 부분에 대해서 코드로 입력해 주시면 됩니다.
실제 모든 부분들은 위에 보이는 윈도에 나타나게 되는 게 tkinter의 특징입니다. 그래서 저는 버튼부터 간단하게 하나하나씩 다루어 볼 예정입니다. 오늘은 우선, button과 Canvas에 대해서 살펴보도록 하겠습니다.
<Button>
Button은 클릭으로 다양한 이벤트들을 연결할 수 있는 GUI입니다. Button을 기반으로 관련해서 동작할 수 있게 작업을 해줍니다.
w = Button ( master, option = value, ... )from tkinter import *
top = Tk()
B = Button(top,width=10 ,height= 10,text = "push")
B.place(x = 10,y = 10)
top.mainloop() 위의 코드를 간단히 살펴보겠습니다.
B = Button(top, width = 10, height = 10, text = "push")
부분을 버튼을 하나 생성하는 부분입니다. 이 부분을 top이라는 위에서 생성한 윈도우에 위치하게 합니다. 여기에서 place명령어를 사용하여 생성한 tk라는 윈도 안에서 버튼이 어디에 위치할 것인지에 대해서 명시하게 됩니다. 다음 코드를 실행하면 다음과 같은 화면이 나타납니다.

실제 보이는 부분들은 버튼에 대해서 명시해주기만 하고 아무런 동작을 하지 않습니다. 보이는 바는 실제 버튼의 크기와 버튼에 명시된 텍스트에 대해서 명시하고 있습니다. 하지만, 이벤트 처리는 되지 않고 있습니다.
관련해서 이벤트 처리 및 몇 가지 변화를 시도해보도록 하겠습니다.
from tkinter import *
from tkinter import messagebox

def Callhello():
   msg = messagebox.showinfo( "Hello Appia","Welcome, please click ad")

top = Tk()
B = Button( top,text = "Push", command = Callhello)
B.place(x = 50,y = 50)
top.mainloop()
먼저, 버튼에 연결할 이벤트를 만들기 위해서 하나의 함수를 생성합니다. 여기에서 messagebox(향후 포스팅)를 생성하여 글자를 출력하게 할 것입니다.
그리고 위에 코드와 조금 달라진 부분은 다음과 같습니다.
B = Button(top,text = "push",command = Callhello)
기존에 입력했던 사이즈 부분을 제거하였고, command라는 부분이 추가되었습니다. 아마 센스 있게 알아보시는 분들이 많을 것입니다. height, width 부분은 값이 입력되지 않는다면 자동으로 글자 사이즈에 맞게 입력을 해줍니다. 그리고 버튼을 눌렀을 때 일어나는 동작들은 command 명령어를 통해서 이루어집니다. 앞에서 만든 함수를 연결해 주시고 실행해 주시면 다음과 같은 화면이 나옵니다.
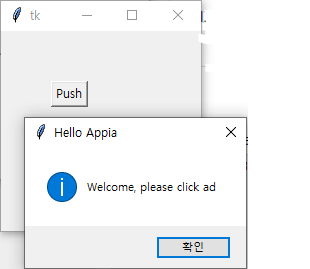
이 부분을 실행해하시고, 버튼을 클릭하시면 다음과 같은 화면이 나올 것입니다. 물론 위의 보이는 부분과 몇 가지 다른 부분이 있습니다. 사이즈를 입력하지 않아도, 자동으로 사이즈를 (텍스트등을 크기를 바탕으로) 설정해 줍니다.
<Canvas>
Canvas는 기본적으로 사진이나 다양한 형태의 그림 등을 명시하기 위해서 표시하는 부분입니다. 저의 경우는 이론상으로만 알고 있고 잘 사용하지 않습니다. 여기에는 그림, 텍스트, 등을 Canvas에 놓을 수 있습니다.
w = Canvas ( master, option = value, ... )from tkinter import *
top = Tk()
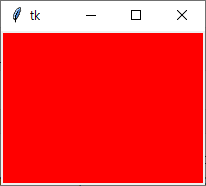
C = Canvas(top,bg = "red", height = 150, width = 200)
C.pack()
top.mainloop()
버튼 부분을 보실 분이라면 쉽게 이해할 수 있을 것입니다. 대부분 다 동일합니다. top에 Canvas를 150x200짜리를 사이즈를 생성합니다. 그리고 pack() 명령어를 통해서 윈도우 표시 되게 합니다. (오늘은 pack, place 명령어를 사용해 봤습니다. 다음 시간에 이에 대해서 별도로 포스팅하겠습니다. ) 다음 코드를 실행해 보면 다음과 같은 결과를 얻어 볼 수 있습니다.
pack() - 윈도우에 상대 위치로 각 widget을 배치하는 방법입니다. 즉, 각 side라는 객체 속성을 바탕으로 LEFT, RIGHT, TOP, BOTTOM을 바탕으로 방향에 맞게 각 객체를 배치해주는 방식입니다.
총 4가지 방향 제공 : LEFT, TOP, BOTTOM, RIGHT
다음 예제를 살펴보겠습니다.
from tkinter import *
root = Tk()
frame = Frame(root)
frame.pack()

topbutton = Button(frame, text = "Top")
topbutton.pack( side = TOP)

leftbutton = Button(frame, text = "Left")
leftbutton.pack( side = LEFT)

rightbutton = Button(frame, text = "Rigtht")
rightbutton.pack( side = RIGHT )

letf1button = Button(frame, text = "Letf1")
letf1button.pack( side = LEFT )

bottombutton = Button(frame, text = "Bottom")
bottombutton.pack( side = BOTTOM)

abottombutton = Button(frame, text = "Bottom1")
abottombutton.pack( side = BOTTOM)

root.mainloop()
위젯을 윈도에 놓는 방법에 대해서 살펴보고자 합니다. 혹자들이나 외서에서는 관련해서 geometry method라고 합니다. 저도 그 말들을 조금 활용하여 geometry method라고 해보겠습니다. 파이썬[Python]의 tkinter 모듈에서 geometry method는 크게 3가지가 있습니다.
pack() - 윈도우에 상대 위치로 각 widget을 배치하는 방법입니다. 즉, 각 side라는 객체 속성을 바탕으로 LEFT, RIGHT, TOP, BOTTOM을 바탕으로 방향에 맞게 각 객체를 배치해 주는 방식입니다.
총 4가지 방향 제공 : LEFT, TOP, BOTTOM, RIGHT
다음 예제를 살펴보겠습니다.
from tkinter import *
root = Tk()
frame = Frame(root)
frame.pack()

topbutton = Button(frame, text = "Top")
topbutton.pack( side = TOP)

leftbutton = Button(frame, text = "Left")
leftbutton.pack( side = LEFT)

rightbutton = Button(frame, text = "Rigtht")
rightbutton.pack( side = RIGHT )

letf1button = Button(frame, text = "Letf1")
letf1button.pack( side = LEFT )

bottombutton = Button(frame, text = "Bottom")
bottombutton.pack( side = BOTTOM)

abottombutton = Button(frame, text = "Bottom1")
abottombutton.pack( side = BOTTOM)

root.mainloop()
먼저 실행한 결과부터 살펴보고 결과에 대해서 살펴보고 좀 더 자세한 이야기를 해보고자 합니다.
먼저 원칙이 하나 있습니다. Left - Rigth, Top-Bottom 각 방향으로 상대성을 동작합니다. 만약 위의 설명에서와 같이 topbutton은 가장 위에 위치하게 됩니다. 그런 후에 Right 버튼을 생성하게 됩니다. 그다음이 이제 문제가 됩니다. 즉 Letft를 하나 더 생성하는 것입니다. 그러면 여기에서 처음 생성한 다음으로 즉, 처음 생성한 Left 버튼의 오른쪽으로 생성됩니다. 예제 코드를 바탕으로 조금이나마 이해가 되셨으면 합니다.
grid() - 윈도를 각 표로 나누어 각 표의 위치에 맞게 놓는 방법입니다. 이 부분은 다른 곳에 나와 있던 예제를 조금 수정하여 다음과 같이 표현해보겠습니다.
from tkinter import *
root = Tk( )
b = 0
for r in range(5):
for c in range(5):
b = b + 1
Button(root, text = str(b)).grid(row = r,column = c)
root.mainloop()
그럼 다음과 같이 명시가 됩니다. grid()는 윈도우를 각 칸으로 나누어 각 위젯을 배치하는 방식입니다. 여기에서 조금 조심해야 하는 부분이 있습니다. 같은 열에 크기가 다르다면, 가장 큰 길이 기준으로 칸이 지정됩니다.
place() - 윈도우에 절대 위치로 각 위젯을 배치하는 구조입니다.
from tkinter import *

root = Tk()

A = Button(root, text = "Add")
A.place(x = 100, y = 100)

B = Button(root, text = "Add1")
B.place(x = 10, y = 10)

C = Button(root, text = "Add2")
C.place(x = 100, y = 10)

D = Button(root, text = "Add2")
D.place(x = 10, y = 100)

root.mainloop()heckbutton
속성에 대해서 참/거짓(true/False)으로 표현할 부분에 대해서 많은 사람들이 체크버튼(checkbutton)을 사용합니다. 체크버튼(checkbutton)은 실제 체크박스라고도 많이 불립니다. 이 부분에 대해서 만드는 방법에 대해서 살펴보도록 하겠습니다.
w = Checkbutton(target, option...)
target - 체크버튼(checkbutton)을 표시할 타켓
option- 체크버튼(checkbutton)에 대한 세부 설정
그럼 다음 예제 코드를 한번 살펴보겠습니다.
from tkinter import *
top = Tk()
C_Var1 = IntVar()
C_Var2 = IntVar()
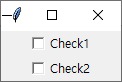
Check1 = Checkbutton(top, text="Check1", variable=C_Var1, \
onvalue=1, offvalue=0)
Check2 = Checkbutton(top, text="Check2", variable=C_Var2, \
onvalue=1, offvalue=0)
Check1.pack()
Check2.pack()
top.mainloop()위의 코드를 잠깐 봐보면 2개의 체크버튼을 생성하는 코드입니다. 실행해 보면 다음과 같은 결과가 나올 것입니다.
... 이하 상단에 카페 글 참고
- tkinter 프로그래밍 순서
1) 메인창 생성(tk 객체 생성) → 2) 위젯 생성(GUI 컴포넌트 생성) → 3) 위젯을 창에 배치(GUI 컴포넌트를 메인 창에 배치)
→ 4) 메인루프 실행(GUI 화면 완성)
- 위젯 리스
| 위젯 | 설명 |
| Label | 텍스트 혹은 이미지 표시 |
| Button | 명령을 실행하기 위한 간단한 버튼 |
| Entry | 한 라인으로 된 단순한 텍스트 박스 |
| ListBox | 리스트 박스 |
| Checkbutton | 값을 토글(toogle)하는 네모난 체크박스 |
| Radiobutton | 다양한 옵션중에 하나를 선택하는 둥근 버튼 |
| Text | 멀티 라인 텍스트 박스로써 일부 Rich Text 기능 제공 |
| Message | Label과 비슷하게 텍스트 표시하나 Label과 달리 자동 래핑 기능이 있음 |
| Scale | 슬라이드 바 |
| Frame | 다른 위젯들을 담기 위한 컨테이너 위젯으로 다른 위젯들을 그룹화할 때 사용 |
| Scrollbar | 스크롤 바 |
| Canvas | 그래프와 점들로 그림을 그릴 수 있으며, 커스텀 위젯을 만드는데 사용하기도 함 |
| Menu | 메뉴 |
| Menubutton | 메뉴 버튼 |
• Label Parameter
- 라벨 문자열
| 이름 | 설명 | 기본값 | 속성 |
| text | 라벨에 표시할 문자열 | - | - |
| textvariable | 라벨에 표시할 문자열을 가져올 변수 | - | - |
| anchor | 라벨안에 문자열 또는 이미지 위치 | center | n, ne, e, se, s, sw, w, nw, center |
| justify | 라벨의 문자열이 여러 줄 일 경우 정렬 방법 | center | center, left, right |
| warplength | 자동 줄내림 설정 너비 | 0 | 상수 |
- 라벨 형태
| 이름 | 설명 | 기본값 | 속성 |
| width | 라벨 너비 | 0 | 상수 |
| height | 라벨 높이 | 0 | 상수 |
| relief | 라벨 테두리 모양 | flat2 | flat, groove, raised, ridge, solid, sunken |
| bonderwidth=bd | 라벨 테두리 두께 | 2 | 상수 |
| background=bg | 라벨 배경 색상 | SystemButtonFace | color |
| foreground=fg | 라벨 문자열 색상 | SystemButtonFace | color |
| padx | 라벨 테두리와 내용의 가로 여백 | 1 | 상수 |
| pady | 라벨 테두리와 내용의 세로 여백 | 1 | 상수 |
- 라벨 형식
| 이름 | 설명 | 기본값 | 속성 |
| bitmap | 라벨에 포함할 기본 이미지 | - | info, warring, error, question,qusethead, hourglass,gray12, gray25, gray50, gray75 |
| image | 라벨에 포함할 임의 이미지 | - | - |
| compound | 라벨에 문자열과 이미지를 동시에 표시 할 때 이미지 위치 | none | bottom, center, left, none. right, top |
| font | 라벨 문자열 글꼴 설정 | TkDefaultFont | frot |
| cursor | 라벨 마우스 커서 모양 | - | 커서 속성 |
label = Label(root, text:"ChatGPT". width=100, height=50, fg="red",
relief="solid", bitmap="info", compound="top")
- 라벨 상태
| 이름 | 설명 | 기본값 | 속성 |
| state | 상태 설정 | nomal | nomal. active, disabled |
| activebackground | 엑티브 상태일 때 라벨 배경 색상 | SystemButtonFace | color |
| activeforeground | 액티브 상태일 때 라벨의 문자열 색상 | SystemButtonText | color |
| disableforeground | 디스에이블 상태일 때 라벨의 문자열 색상 | SystemDisabledText | color |
- 라벨 하이라이트
| 이름 | 설명 | 기본값 | 속성 |
| highlightcolor | 라벨이 선택되어있을 때 색상 | SystemWindowFrame | color |
| highlightbackground | 라벨이 선택 되지 않을 때 색상 | SystemButtonFace | color |
| highlightthicknesss | 라벨이 선택되었을때 두께 | 0 | 상수 |
• Button Parameter
- 버튼 동작
| 이름 | 설명 | 기본값 | 속성 |
| takefocus | Tab키로 위젯 이동 허용 여부 | True | Boolean |
| command | 버튼이 active 상태일 때 실행하는 함수 | - | 메소드, 함수 |
| repeatdelay | 버튼이 눌러진 상태에서 command 실행까지 대기시간 | 0 | 상수(ms) |
| repeatinterval | 버튼이 눌러진 상태에서 command 실행 반복 시간 | 0 | 상수(ms) |
• Entry Method
| 이름 | 설명 |
| insert(index,"string) | index위치에 문자열 추가 |
| delete(start_index, end_index) | start_index ~ end_index까지 문자열 삭제 |
| get() | 기입창의 텍스트를 문자열로 변환 |
| index(index) | index에 대응하는 위치 획득 |
| icursor(indexx) | index 앞에 키보드 커서 설정 |
| select_adjust(index) | index 위치까지의 문자열을 불록처리 |
| select_range(start_index, end_index) | start_index ~ end_index까지 블록처리 |
| select_to(index) | 키보드 커서부터 index까지 블록처리 |
| select_from(index) | 키보드 커서의 색인 위치를 index위치 문자로 설정하고 선택 |
| select_present() | 블록 처리 돼 있는 경우 True 아니면 False |
| select_clear() | 블록 처리 해제 |
| xview() | 가로스크롤 연결 |
| xview_scroll(num, str) | 가로스크롤 속성 설정 |
- 상태설정
| 이름 | 설명 | 기본값 | 속성 |
| state | 상태 설정 | normal | normal.readonly,disable |
| readonlybackground | readonly 상태일 때 기입차의 배경 색상 | SystemButtonFace | color |
| disablebackground | disabled 상태일 때 기입창에 배경 색상 | SystemButtonFace | color |
| disableforeground | disabled 상태일때 기입창의 문자열 색상 | SystemDisabledText | color |
>>나중에 작성
https://m.blog.naver.com/sisosw/221408280038
+ GPT 좌가 만들어준 계산기
import tkinter as tk

def on_button_click(value):
    current_text = entry.get()
    entry.delete(0, tk.END)
    entry.insert(tk.END, current_text + str(value))

def clear_entry():
    entry.delete(0, tk.END)

def calculate_result():
    try:
        result = eval(entry.get())
        entry.delete(0, tk.END)
        entry.insert(tk.END, str(result))
    except Exception as e:
        entry.delete(0, tk.END)
        entry.insert(tk.END, "Error")

# Create the main window
window = tk.Tk()
window.title("Simple Calculator")

# Entry widget for displaying and entering values
entry = tk.Entry(window, width=20, font=("Arial", 16))
entry.grid(row=0, column=0, columnspan=4)

# Buttons for digits and operations
buttons = [
    '7', '8', '9', '/',
    '4', '5', '6', '*',
    '1', '2', '3', '-',
    '0', '.', '=', '+'
]

row_val = 1
col_val = 0

for button in buttons:
    tk.Button(window, text=button, width=5, height=2, command=lambda b=button: on_button_click(b) if b != '=' else calculate_result()).grid(row=row_val, column=col_val)
    col_val += 1
    if col_val > 3:
        col_val = 0
        row_val += 1

# Clear button
tk.Button(window, text="C", width=5, height=2, command=clear_entry).grid(row=row_val, column=col_val)

# Run the main loop
window.mainloop()
그리고 해석>>>
import tkinter as tk: This line imports the Tkinter module and aliases it as tk for brevity.
def on_button_click(value):
    current_text = entry.get()
    entry.delete(0, tk.END)
    entry.insert(tk.END, current_text + str(value))
: This function is called when a digit or operator button is clicked. It retrieves the current content of the entry widget, deletes it, and inserts the updated content by concatenating the clicked value.
def clear_entry():
    entry.delete(0, tk.END)
: This function is called when the "C" button is clicked. It clears the content of the entry widget.
def calculate_result():
    try:
        result = eval(entry.get())
        entry.delete(0, tk.END)
        entry.insert(tk.END, str(result))
    except Exception as e:
        entry.delete(0, tk.END)
        entry.insert(tk.END, "Error")
: This function is called when the "=" button is clicked. It tries to evaluate the expression in the entry widget using the eval() function. If successful, it displays the result; otherwise, it shows an "Error" message.
window = tk.Tk()
window.title("Simple Calculator")
: These lines create the main window for the calculator and set its title.
entry = tk.Entry(window, width=20, font=("Arial", 16))
entry.grid(row=0, column=0, columnspan=4)
: This creates an Entry widget for displaying and entering values. The widget is placed in the first row, first column, and spans 4 columns.
buttons = [
    '7', '8', '9', '/',
    '4', '5', '6', '*',
    '1', '2', '3', '-',
    '0', '.', '=', '+'
]
: A list of buttons containing digits, operators, and special characters.
row_val = 1
col_val = 0
: Initialize variables to keep track of the row and column positions for placing buttons.
for button in buttons:
    tk.Button(window, text=button, width=5, height=2, command=lambda b=button: on_button_click(b) if b != '=' else calculate_result()).grid(row=row_val, column=col_val)
    col_val += 1
    if col_val > 3:
        col_val = 0
        row_val += 1
: A loop to create buttons for each element in the buttons list. The lambda function is used to pass the corresponding button value to the on_button_click or calculate_result functions. The buttons are placed in a grid layout.
tk.Button(window, text="C", width=5, height=2, command=clear_entry).grid(row=row_val, column=col_val): Creates the "C" button for clearing the entry and places it in the grid.
window.mainloop(): This starts the Tkinter event loop, allowing the GUI to run and respond to user interactions
bonus Jokes:
Why did Anakin Skywalker cross the road?: To get to the Dark Side!
Why did the bicycle fall over?: Because it was two-tired!
Why don't scientists trust atoms?: Because they make up everything!
Python 외부 라이브러리:
- pip: 파이썬 모듈이나 패키지를 설치할 수 있는 도구. pip로 파이썬 프로그램을 설치하면 관계있는 모듈이나 패키지를 같이 설치해 준다.
- pip install / uninstall
PyPI(Python package index)는 파이썬 소프트웨어를 모와놓은 저장공간이다. 10만 건 이상에 파이썬 전용 패키지가 등록 돼있고 그것들을 이곳에서 누구든지 다운로드할 수 있다. 직접 받을 수도 있지만 pip를 사용해도 설치할 수 있다.
pip install somePackage # somePackage를 PyPI에서 가져와서 설치
삭제도 간단하다
pip uninstall somePackage # 삭제
- 최신 버전 업그레이드하기
pip install --upgrade SomePackage #SomePackage를 최신 버전으로 업그레이드
- 설치된 패키지 확인
pip list(base) C:\Users\602-7>pip list
Package Version
----------------------------- ---------------
absl-py 2.0.0
aiobotocore 2.5.0
aiofiles 22.1.0
aiohttp 3.8.5
aioitertools 0.7.1
aiosignal 1.2.0
aiosqlite 0.18.0
==================생략=======================
• 패키지 예시
- Faker (대상혁)
[(이름1, 주소1), (이름2, 주소2), ..., (이름30, 주소30)]: 위와 같은 형식의 테스트 데이터가 많이 필요하다고 가정해 보자. 이럴때 직접 데이터를 입력하지 않고 테스트 데이터를 만들수 있는 라이브러리가 Faker(대상혁)이다.
eg)
from faker import Faker
fake = Faker()
fake.name()
'Catherine Brooks'
한글 이름도 가능하다
from faker import Faker
fake = Faker("ko-KR")
fake.name()
'대상혁'
주소도 가능하다.
from faker import Faker
fake = Faker("ko-KR")
fake.address()
'충청북도 청주시 흥덕구 논현가 (민수홍배면)'
- Faker 활용
| 항목 |
| fake.name() |
| fake.address() |
| fake.postcode() |
| fake.country() |
| fake.company() |
| fake.job() |
| fake.phone_number() |
| fake.email() |
| fake.user_name() |
| fake.pyint(min_value=0, max_value=100) # 0 부터 100 사이의 임의의 숫자 |
| fake.ipv4_private() |
| fake.text() |
| fake.color_name() |
'AIoT' 카테고리의 다른 글
| AIoT 정규 13일차 (0) | 2024.01.16 |
|---|---|
| AIoT 정규 12일차 (2) | 2024.01.15 |
| AIoT 정규 10일차 (1) | 2024.01.11 |
| AIoT 정규 9일차 (2) | 2024.01.10 |
| AIoT 정규 8일차 (5) | 2024.01.09 |